Combining Images into a PDF using OpenOffice Writer
There are many different ways to combine images into a document and convert it into a PDF file.
This document contains a step-by-step guide on how to combine images into a single PDF file using Apache OpenOffice Writer in the version 4.1.7.
Combining individual pages or images into a PDF is a special case.
Other versions of Apache OpenOffice may require a different procedure. However, the same principles should apply.
- Adding Images in OpenOffice
- Modifying Images in OpenOffice
- Inserting a Page Break in OpenOffice
- PDF Export in OpenOffice
- PDF Printing in OpenOffice
Adding Images in OpenOffice

Please click on Insert - Picture - From File...to open the dialog for the adding of images.
Select the image you wish to add in the dialog window and add it to the document by clicking Open.
Modifying Images in OpenOffice
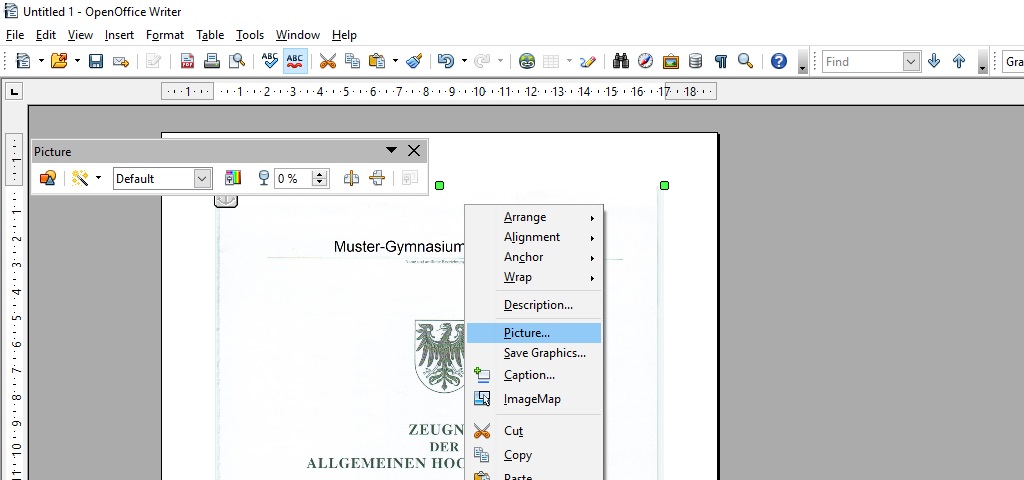
Right click the image to open the context menu. Select Picture... in the context menu to open the dialog window for the image settings.
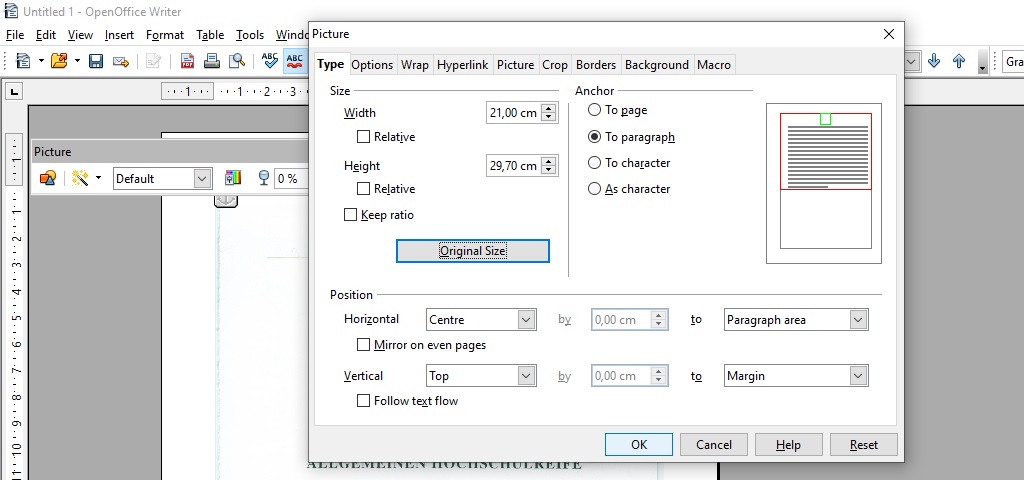
If you want to adjust the image to the page size (e.g. to insert scanned images in full size), you can do so via the image settings dialog. For scanned A4 documents, it should suffice to select Original Size in the Type tab and confirm your selection with OK.
Inserting a Page Break in OpenOffice

If you would like to add more images on a new page, open the menu for manual page breaks via the Insert - Manual Break... buttons in the menu. These buttons will be deactivated if the image is still selected. To de-select the image, use the Esc key.
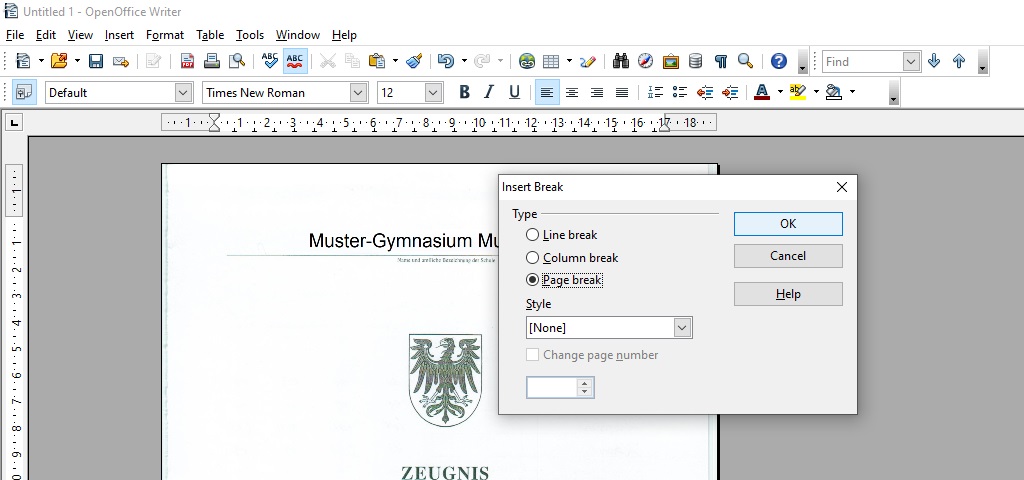
Click on Page break and confirm with OK.
You can now add additional images if you repeat the previous steps accordingly.
PDF Export in OpenOffice

Please select File - Export as PDF... to open the dialog for PDF export.
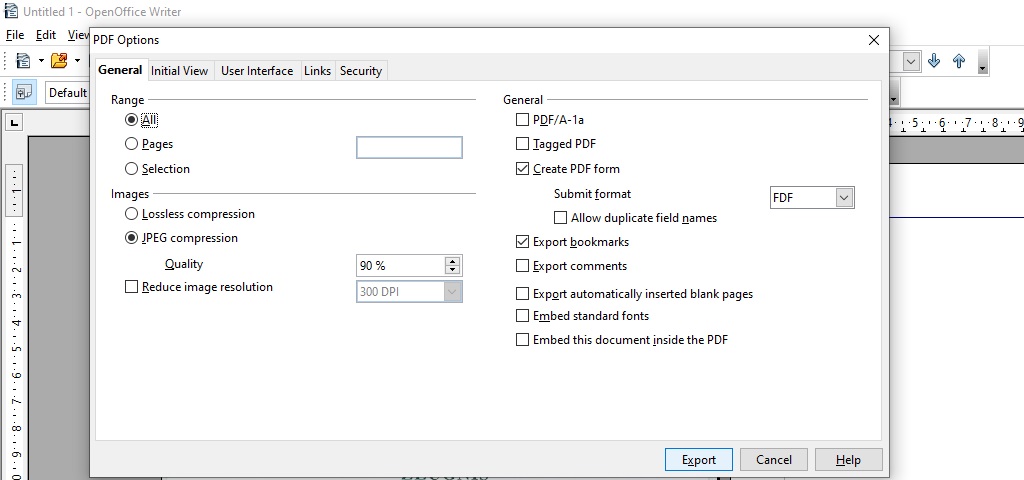
You can start the export process by clicking on Export.
When prompted to do so, please select a save location and confirm your choice by clicking Save.
PDF Printing in OpenOffice
Under Microsoft Windows 10, you also have the option of printing documents directly into a PDF file.
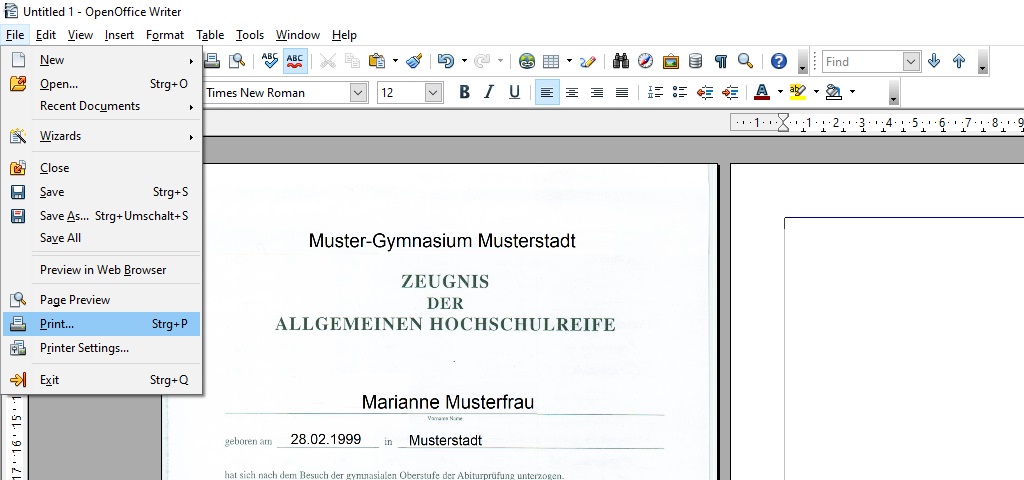
To do so, please use the menu options File - Print....
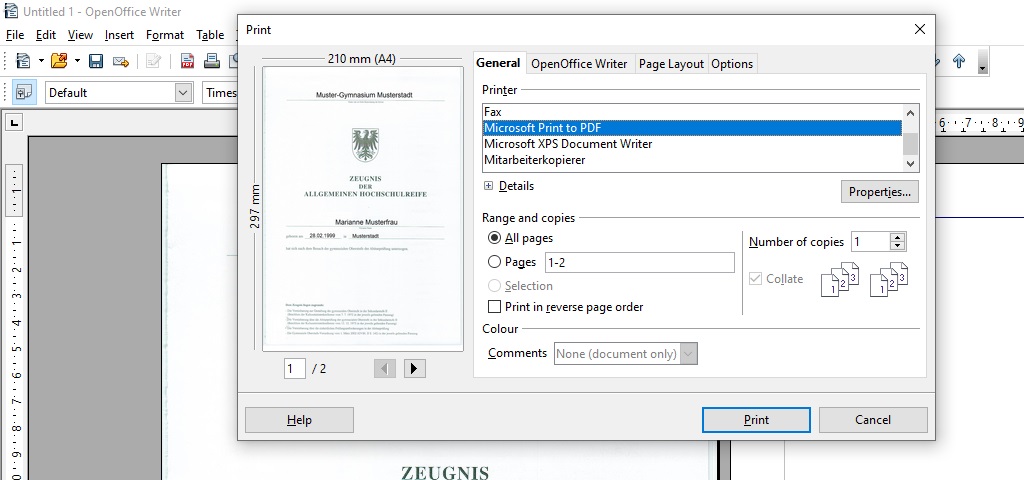
In the dialog window that opens, please select the printer called Microsoft Print to PDF in the General tab and confirm your choice by clicking Print.
When prompted to do so, please select a save location and confirm your choice by clicking Save.